Hair Knowledge
How to Install a Lace Front Wig Like a Pro

Properly install a lace front wig can elevate your entire look—making it virtually undetectable while keeping your natural hair safe underneath. Whether you’re a beginner or a seasoned stylist, this step-by-step guide will show you how to apply a lace front wig like a professional.
I. What You’ll Need Before Installation
Before you even start to install a lace front wig, having the right tools and preparing your natural hair properly is essential for a secure and natural-looking result. Skipping this step can lead to discomfort, poor blending, or even damage to your natural hair. Here’s everything you’ll need to ensure a flawless install from the start.
1. Tools & Supplies
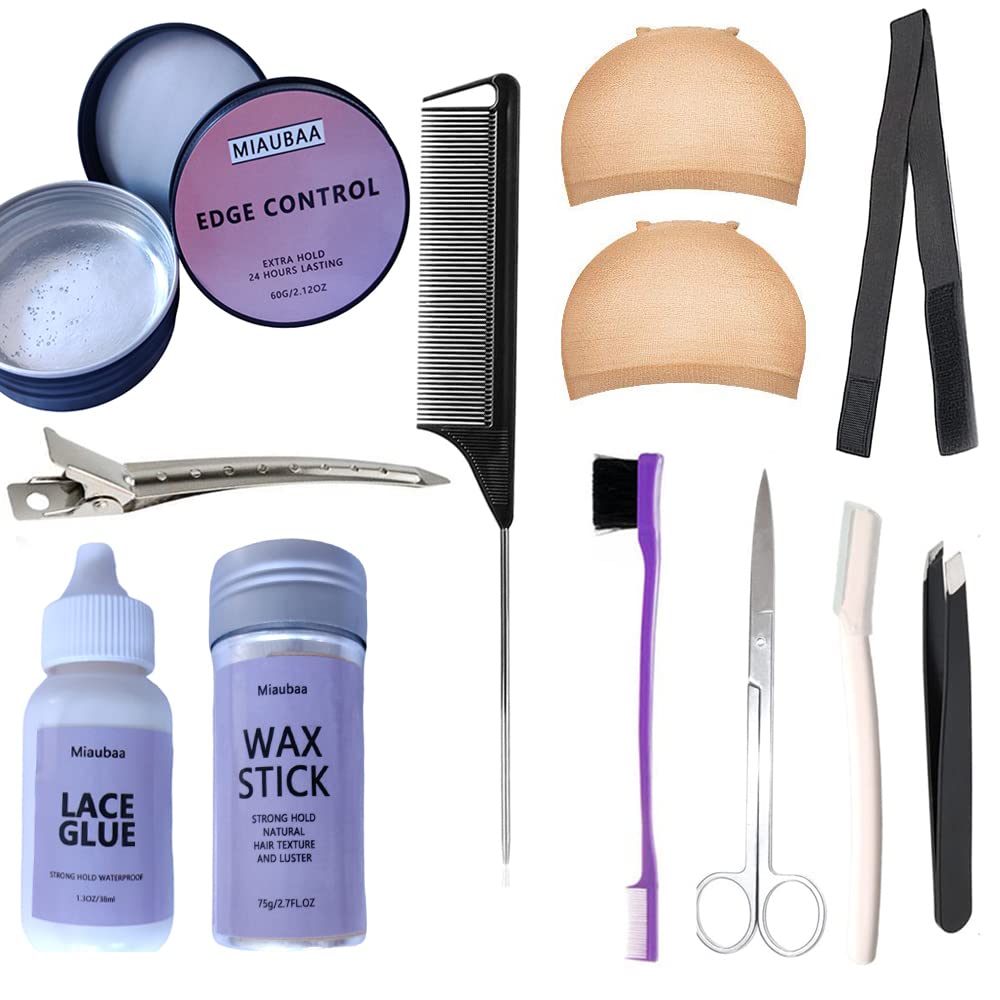
Make sure you have the following items on hand:
-
Lace front wig: Choose one that fits your head size and skin tone (transparent, medium brown, HD lace, etc.).
-
Wig cap: A wig cap helps flatten your natural hair and protects your scalp. Nude or brown mesh caps are preferred for blending.
-
Adhesive: Depending on your method, this can be:
-
Lace glue (for long-term wear)
-
Wig tape (for strong yet removable hold)
-
Got2b Glued spray or mousse (for temporary installs)
-
-
Scissors or eyebrow razor: To trim excess lace along the hairline.
-
Tweezers: For plucking the hairline to create a more natural look.
-
Makeup or lace tint: To blend the lace with your skin tone.
-
Blow dryer: Helps set adhesives and quicken drying time.
-
Rat-tail comb: For parting hair and pressing down edges.
-
Edge brush & styling gel: To smooth baby hairs and finish the hairline.
-
Alcohol pads or scalp cleanser: To clean your forehead and remove oils before applying glue.
2. Prepping Your Natural Hair
For a comfortable and undetectable install, your natural hair must be laid flat and clean.
-
Wash and condition your hair to remove dirt, oil, and product buildup.
-
Blow-dry or air-dry your hair completely. Wet hair under a wig can cause odor or scalp irritation.
-
Braid or cornrow your hair into flat, low-profile patterns. For short hair, you can slick it back tightly with gel or mousse.
-
Wear a wig cap that closely matches your skin tone. Secure it snugly to keep your hair in place and act as a protective barrier.
-
Optional: Apply scalp protector before adhesives to prevent irritation, especially if you have sensitive skin.
✅ Pro Tip: Always test your lace glue or tape on a small patch of skin 24 hours before use to avoid allergic reactions.
II. Step-by-Step Installation Guide
Once your hair and tools are ready, it’s time to install the lace front wig. Whether you’re a beginner or a salon stylist, following the right technique ensures your wig looks seamless, secure, and natural.
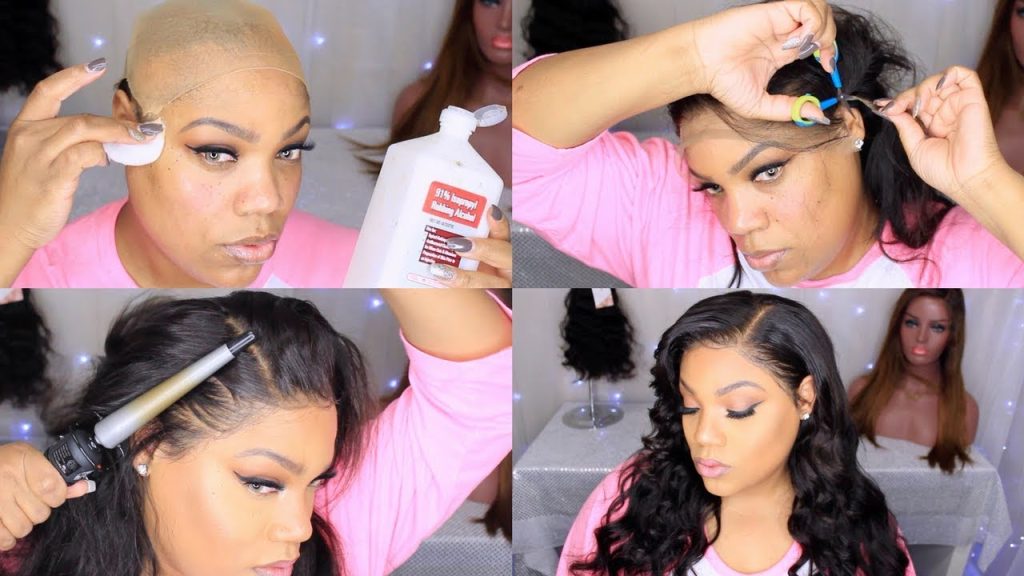
Step 1: Clean and Prep Your Skin
Use an alcohol pad or micellar water to gently cleanse your forehead, removing any oil, makeup, or sweat. This allows adhesives to bond better and last longer.
✅ Tip: If you have sensitive skin, apply a skin protector before glue or tape to prevent irritation.
Step 2: Apply the Wig Cap (Bald Cap Method – Optional)
If you want a truly undetectable hairline, use the bald cap method:
-
Place the wig cap over your head and pull it down past your ears.
-
Use Got2B Glued Spray or lace gel along the hairline.
-
Blow-dry until tacky, then trim the excess cap just past your natural hairline.
-
Blend the cap with your foundation or lace tint for a natural scalp illusion.
Step 3: Position the Wig
-
Gently place the lace wig on your head.
-
Adjust the wig so the lace front lines up with your natural hairline.
-
Use the adjustable straps and combs (if available) to secure the wig in place temporarily.
Make sure the ear tabs sit evenly on both sides.
Step 4: Apply Adhesive
Depending on your desired hold, choose one of the following methods:
💧 Using Lace Glue
-
Apply a thin layer of lace glue along the hairline.
-
Wait until it becomes tacky (semi-clear).
-
Add 1–2 more layers for extra hold (letting each layer dry before adding the next).
-
Carefully press the lace into the glue with a rat-tail comb or the back of a brush.
🎯 Using Lace Tape
-
Cut tape into strips and apply along the hairline.
-
Peel off the backing and press the lace down gently.
🌀 Using Got2B Spray (No-glue method)
-
Spray along the hairline and blow-dry until tacky.
-
Press the lace down firmly.
Step 5: Trim the Lace
Once the lace is fully secured:
-
Use sharp scissors or an eyebrow razor to trim the excess lace along the hairline.
-
Follow a zig-zag motion instead of a straight line for a more natural edge.
-
Be careful not to cut too close to the hairline.
Step 6: Blend and Style
-
Use foundation, lace tint, or powder to blend the lace into your skin tone.
-
Create a natural part using a hot comb and wax stick (optional).
-
Use a scarf to wrap the hairline for 5–10 minutes to melt the lace into the skin.
-
Finish by styling the wig as desired: straighten, curl, or wear it down.
Step 7: Lay Baby Hairs (Optional)
-
Use an edge brush and gel to shape baby hairs around the hairline.
-
For a softer, more natural look, tweeze a few strands and swoop them gently.
✨ Final Check:
-
The wig should feel secure but comfortable.
-
No white residue or visible lace should be showing.
-
Your lace front wig should look like it’s growing from your scalp.
✅ Pro Tip: Take your time, especially when trimming lace or applying glue. Precision is key for a flawless, salon-quality finish.
III. How to Remove a Lace Front Wig Safely
Proper removal of a lace front wig is just as important as the application. Rushing or pulling on the lace can damage both your natural hairline and the wig itself. Follow these safe and effective steps to remove your wig without causing irritation or hair breakage.
Step 1: Loosen the Adhesive
The first step is to gently break down the glue or tape without tugging at the lace.
– Lace Glue:
-
Use a lace adhesive remover (oil- or alcohol-based).
-
Apply it along the entire hairline using a cotton pad or spray bottle.
-
Let it sit for 2–5 minutes until the glue softens.
✅ Pro Tip: If you don’t have a remover, natural oils like olive oil, coconut oil, or baby oil can work, though they take longer.
– Lace Tape:
-
Peel up the edges slightly and apply remover underneath.
-
Wait for the tape to lose its grip before pulling.
– Got2B Spray:
-
Apply warm water or micellar water to loosen the hold.
-
Gently massage the area with your fingers until the wig starts to lift.
Step 2: Gently Peel Off the Lace
-
Start lifting the lace from one ear and move slowly across the forehead.
-
Use your fingers to separate the lace from your skin.
-
If you feel any resistance, stop and apply more remover—never pull forcefully.
Step 3: Clean Your Skin and Hairline
Once the wig is off:
-
Use a gentle cleanser or micellar water to remove any glue residue from your skin.
-
Rinse with lukewarm water and pat dry.
-
Apply a soothing toner or aloe gel to reduce irritation, especially if you have sensitive skin.
Step 4: Clean the Wig Lace
To maintain the wig’s reusability:
-
Apply remover to the underside of the lace where glue or tape was applied.
-
Use a soft toothbrush or edge brush to gently clean away any buildup.
-
Rinse with cold water and let the wig air-dry on a wig stand.
🚫 Avoid scrubbing or using harsh chemicals, which can tear the lace or weaken the knots.
Step 5: Store the Wig Properly
-
Once clean and dry, place your wig on a mannequin head or wig hanger.
-
Keep it in a silk bag or dust-proof container to avoid tangling and dust buildup.
-
Avoid heat or direct sunlight to preserve the quality of the hair and lace.
✅ Bonus Tip: If you wear lace wigs often, give your scalp a break in between applications. This allows your hairline to breathe and stay healthy.
IV. Maintenance Tips to Extend the Lifespan of Your Lace Front Wig
Lace front wigs are an investment—both in beauty and in cost. With proper care, a high-quality lace wig can last from 6 months up to over a year, depending on how often you wear it. Below are essential tips to help you keep your wig looking flawless and extend its lifespan.
1. Clean Your Wig Regularly (But Not Too Often)
-
Frequency: Clean your lace wig every 8–10 wears or whenever there’s noticeable product buildup.
-
Method: Use a sulfate-free, wig-friendly shampoo and lukewarm water. Avoid scrubbing the lace or hair aggressively.
-
Conditioning: Always follow with a hydrating conditioner, focusing on the mid-lengths and ends—not the knots at the lace base.
✅ Avoid washing too frequently to preserve the lace integrity and prevent drying out the hair strands.
2. Detangle with Care
-
Always detangle before washing, starting from the tips and working your way up to the roots.
-
Use a wide-tooth comb, paddle brush, or a wig-specific detangling brush.
-
Be extra gentle at the lace front area to avoid pulling and tearing the delicate lace.
3. Air Dry Whenever Possible
-
Blot your wig gently with a towel after washing.
-
Let it air dry on a wig stand to maintain its shape and reduce heat damage.
-
If you must use a blow dryer, opt for low heat with a diffuser attachment.
4. Use Heat Sparingly
-
Lace front wigs, especially human hair ones, can handle styling tools—but that doesn’t mean they should be used daily.
-
Apply heat protectant before flat ironing or curling.
-
Keep styling temperatures below 180°C (350°F) to protect the strands and adhesive base.
5. Protect the Lace
-
Avoid tugging, scratching, or brushing over the lace front.
-
If applying makeup near the hairline, gently clean the lace after each use to avoid buildup.
-
Never sleep or shower with your wig unless it’s a long-term sew-in or adhesive application—and even then, use a silk bonnet or scarf.
6. Store Properly Between Uses
-
Always store your wig on a mannequin head or in its original packaging to retain its shape.
-
Use a silk or satin bag to reduce friction, which helps prevent tangles and dryness.
-
Keep your wig away from direct sunlight, dust, and moisture.
7. Refresh with Professional Maintenance
-
Bring your lace front wig to a stylist every few months for deep conditioning, lace repairs, or professional detangling.
-
Stylists can also re-knot or reinforce the lace if the hair begins to shed near the front.
By following these maintenance tips, you can dramatically improve the look, feel, and longevity of your lace front wig—saving money and keeping your style fresh day after day.
Conclusion
Mastering how to install a lace front wig is all about technique, patience, and practice. Whether you’re wearing it daily or for special occasions, a flawless install can boost confidence and style in an instant. With the right prep, tools, and care, your lace front wig will look natural, feel secure, and last longer.