Hair Knowledge
I-Tip Hair Extensions: A Complete Introduction for Salon Professionals
I-tip extensions are one of the most versatile and damage-free hair extension methods available today. Especially popular in professional salons across Europe, this cold fusion technique offers both long-term wear and flexibility—without the need for glue or heat. In this guide, we’ll walk you through exactly what I-tip extensions are, how they work, and who they’re best suited for.
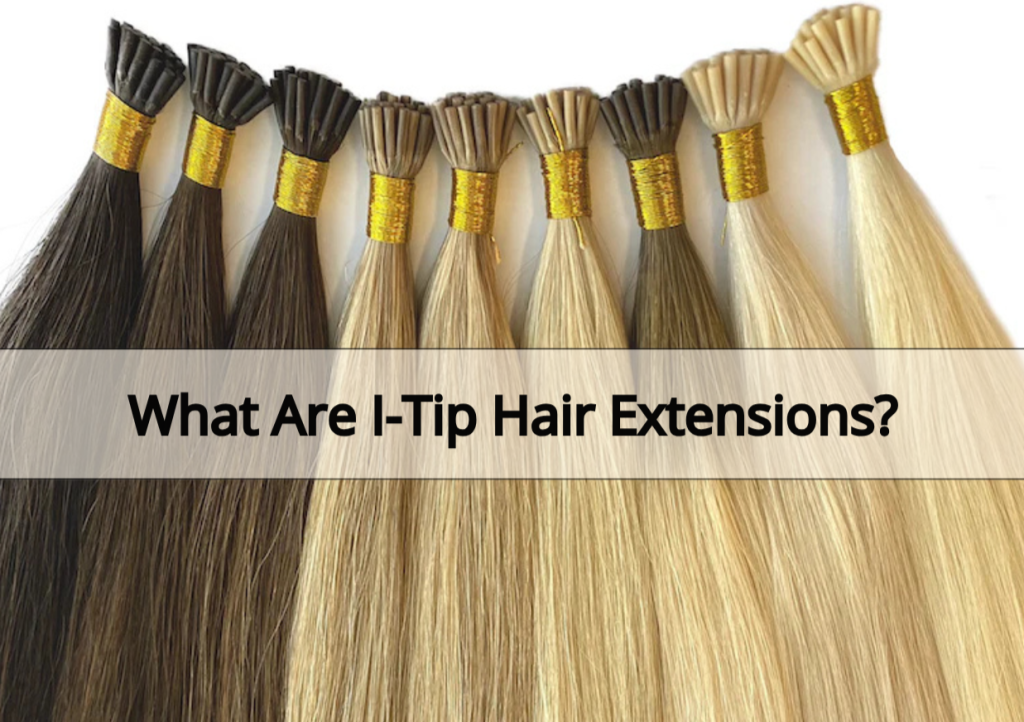
I. What Are I-Tip Hair Extensions?
I-tip extensions (also known as stick tip extensions) are a type of strand-by-strand, keratin bond hair extension designed for cold fusion application. Each hair strand is tipped with a small, cylindrical keratin bond that resembles the shape of the letter “I.” Unlike keratin bond extensions that require heat to melt and bond, I-tips are installed using micro rings or beads, making them a gentle and reusable option for clients who want longer, fuller hair with minimal risk of damage.
II. Structure of I-Tip Hair Extensions
I-tip extensions are engineered for precision, comfort, and long-term wear. Their structure is simple but highly effective, combining strong hold with flexibility and natural movement. Here’s a closer look at what makes up a professional-grade I-tip extension:
1. Hair Strand: 100% Human Hair
At the core of every I-tip extension is high-quality Remy or Virgin human hair.
- Remy Hair: All cuticles remain intact and aligned in the same direction. This prevents tangling, maintains softness, and ensures the hair blends seamlessly with natural strands.
- Virgin Hair: Collected from a single donor, never chemically processed—ideal for clients who want premium, long-lasting results.
- Available in multiple grades: Single drawn, double drawn, or super double drawn for different volume levels from root to tip.
- Custom textures and colors: Straight, wavy, curly, and custom-dyed tones for perfect integration with each client’s natural hair.
At N Hair Factory, we offer customizable strand weight (0.8g–1g) and color-matching services for precision salon work.
2. Pre-Bonded Tip: Keratin Cylinder
Each hair strand is tipped with a cylindrical keratin bond, shaped like the letter “I”. This is the part that slides into the micro or nano ring during installation.
- Material: High-quality Italian keratin or polymer, known for durability and scalp safety.
- Diameter: Typically 2–3 mm wide, making it compatible with standard micro rings or smaller nano rings.
- Shape: Uniform, rigid, and heat-resistant to withstand styling tools—yet flexible enough to move naturally with your client’s hair.
- Secure anchoring: Designed to lock into position inside the ring without slipping or shedding.
3. Ring Compatibility
Although technically not part of the extension itself, rings or beads are an essential part of the structure during application:
- Micro Rings: Suitable for normal to thick hair.
- Nano Rings: Thinner and more discreet, perfect for fine hair.
- Silicone-Lined Options: Add extra grip and cushioning for sensitive scalps.
The structure of the I-tip extension is specially crafted to work seamlessly with these rings, creating a bond that is strong, lightweight, and nearly invisible.
III. How to Install I-Tip Hair Extensions?
I-tip hair extensions are applied using a strand-by-strand cold fusion method, offering exceptional control over placement and styling. Since no glue or heat is used, this method is particularly safe for clients with fragile, color-treated, or fine hair.
Installation requires professional technique and specialized tools—but when done correctly, the results are secure, seamless, and long-lasting.
1. Step-by-Step Installation Process
Step 1: Section the Hair
Use a tail comb to create clean, horizontal sections—starting from the nape and working upward. Clip the upper layers away to isolate the application area.
Step 2: Thread the Ring
Using a pulling needle or loop tool, take a small section of the client’s natural hair and thread it through a micro or nano ring. The amount of natural hair should match the weight of the I-tip strand for optimal hold.
Step 3: Insert the I-Tip Strand
Slide the keratin-tipped extension into the same ring. Make sure the tip is positioned completely inside the bead for even distribution and security.
Step 4: Clamp and Secure
Use flat extension pliers to clamp the ring shut. The bond should lie flat and close to the scalp—but not so close that it pulls on the hair or causes tension.
⚠️ Pro Tip: Leave about 0.5–1 cm of space between the ring and the scalp to allow for natural movement and prevent discomfort.
2. Recommended Tools
To ensure a smooth and safe installation, the following tools are essential:
| Tool | Purpose |
|---|---|
| Loop Tool or Pulling Needle | Threads natural hair through the ring |
| Micro/Nano Rings (with or without silicone) | Secures the bond between I-tip and natural hair |
| Sectioning Clips | Keeps the workspace neat and efficient |
| Flat Extension Pliers | Used to close and secure the rings |
| Heat Protector Spray (optional) | Protects hair during styling after installation |
At N Hair Factory, we can supply you with compatible rings and tools along with your custom I-tip orders.
3. Installation Time and Coverage
- Full Head Application: Typically requires 100–200 strands, depending on the desired length and volume.
- Time Required: Around 2–3 hours for a full install by an experienced stylist.
- Partial Application: Around the crown, hairline, or sides may require only 30–60 strands.
4. Best Practices for Flawless Results
- Match the extension weight with the client’s hair strength.
- Blend colors and textures in advance.
- Always double-check that the keratin tip is fully inside the ring before clamping.
- Avoid placing I-tips too close to the hairline or parting—leave enough coverage for a natural blend.
🧠 Why Professional Application Matters
Though the cold fusion method appears simple, the success of I-tip installation depends heavily on technique. Poor placement can cause slippage, tangling, or damage to the client’s natural hair.
For best results:
- Ensure consistent tension and spacing across each row.
- Use clean sectioning to avoid overlapping strands.
- Educate clients on proper aftercare to extend wear time.
IV. Pros and Cons of I-Tip Hair Extensions
I-tip hair extensions are increasingly favored in European salons for their balance of durability, comfort, and natural finish. However, as with any extension method, they come with both strengths and considerations. Understanding these factors is essential to ensure the best results for both stylist and client.
✅ Key Benefits
| Benefit | Description |
|---|---|
| No Heat or Glue | Applied using the cold fusion method—ideal for clients with fragile or processed hair. |
| Strand-by-Strand Precision | Allows stylists to target specific areas (e.g. crown, sides) for custom volume and length. |
| Reusable | I-tip extensions can be removed, cleaned, and reapplied—saving time and cost in the long run. |
| Natural Movement | Each strand moves independently, creating a more natural look and feel than wefted methods. |
| Secure Yet Flexible Hold | When installed properly, extensions stay in place during daily activities and light exercise. |
| Gentle on the Scalp | No adhesive or chemical residue—great for sensitive skin types. |
💡 I-tips are also highly compatible with European hair types due to their discreet bonds and ability to blend seamlessly with fine to medium textures.
⚠️ Important Considerations
While I-tip extensions offer numerous advantages, they are not a one-size-fits-all solution. Below are key points to evaluate before recommending them to clients:
| Factor | Explanation |
|---|---|
| Requires Professional Application | Incorrect installation may cause slippage, discomfort, or uneven weight distribution. |
| Not Ideal for Very Fine or Oily Hair | Micro rings may slide on oily scalps or extremely soft hair unless proper prep is done. |
| Maintenance Every 6–8 Weeks | Extensions grow out with natural hair and need repositioning to avoid matting or tangling. |
| Time-Intensive Initial Install | A full head application can take 2–3 hours—more than tape-in or clip-in methods. |
| Styling Restrictions | Though versatile, tight ponytails or updos may reveal bonds if not carefully placed. |
📌 Pro Tip: Always perform a strand test and scalp consultation before applying I-tips, especially for first-time extension wearers.
By balancing these benefits and considerations, stylists can determine whether I-tip extensions are the right choice for each client’s hair type, lifestyle, and styling preferences.
V. How to Care for I-Tip Hair Extensions
Proper aftercare is the key to extending the life of I-tip hair extensions while protecting the client’s natural hair. With regular maintenance and the right hair care routine, I-tip extensions can last up to 3–4 months with reapplications.
Below are expert-level care tips designed for both salon professionals and clients at home.
1. Washing Tips
- Frequency: 2–3 times per week is ideal. Over-washing can loosen the rings or cause dryness.
- Products: Use sulfate-free, alcohol-free shampoos and conditioners to maintain moisture without weakening the keratin bonds.
- Technique:
- Tilt the head back to avoid tangling.
- Massage the scalp gently without disturbing the bonds.
- Rinse thoroughly to prevent product buildup near the rings.
⚠️ Avoid applying conditioner or oils directly at the root or near the beads—this can cause slippage.
2. Brushing & Detangling
- Use a loop brush or a soft-bristle extension brush.
- Always start brushing from the ends, working your way up to the roots.
- Hold the bonds as you brush to reduce tension and prevent pulling.
💡 Pro Tip: Brush hair 2–3 times daily, especially before bed and after washing.
3. Styling & Heat Usage
- Blow-drying: Use a medium setting, and always dry the roots completely to prevent moisture buildup around the beads.
- Heat tools: Safe to use on the mid-lengths and ends—keep temperatures below 180°C (356°F).
- Avoid root area: Do not apply direct heat to the bonds or beads.
✅ I-tip extensions are heat-resistant but not heat-proof. Excessive styling can shorten their lifespan.
4. Sleeping with I-Tips
- Tie hair into a loose braid or ponytail before sleeping to prevent matting.
- Use a silk or satin pillowcase to reduce friction and keep hair smooth.
- Never sleep with wet hair—it can lead to tangling and mold near the beads.
5. Swimming, Sauna & Sports
- Before swimming: Braid hair and apply a leave-in conditioner or UV protectant.
- After exposure: Rinse immediately with fresh water and use a gentle cleansing shampoo.
- Chlorine and saltwater can weaken keratin tips and dry out the strands, so limit exposure when possible.
🏊♀️ Recommend clients use a swim cap if they swim frequently.
6. Reinstallation & Salon Maintenance
- Salon visits every 6–8 weeks are essential to reposition the extensions as natural hair grows.
- During these appointments:
- Beads are removed gently.
- Strands are cleaned and reinstalled using new rings.
- Scalp and hair health are assessed.
🔁 With proper care and rotation, high-quality I-tip extensions can be reused up to 3–4 times before needing replacement.
By following these aftercare routines, your clients can enjoy smooth, beautiful I-tip extensions that look and feel like natural hair for months. Want a printable salon aftercare checklist? I can help you design one as a lead magnet or post-purchase insert.
VI. Who Are I-Tip Extensions Best For?
I-tip hair extensions are a versatile, professional-grade solution suited for a wide range of clients. However, they deliver the best results when matched to the right hair type, lifestyle, and styling needs.
1. Clients with Fine to Medium Hair
Thanks to the individual strand-by-strand installation, I-tip extensions allow for strategic volume building—especially useful for clients with fine or thinning hair.
- Why it works: The lightweight nature of each bond reduces tension on fragile strands.
- Micro or nano rings can be selected based on density for a seamless finish.
💡 I-tip is often recommended over keratin bonds for fine hair clients who want to avoid heat-based fusion methods.
2. Clients Who Want Long-Term Wear
I-tip extensions can last 8–12 weeks per install, and the same hair can be reused up to 3–4 times with proper care. This makes them ideal for:
- Professionals with a busy schedule
- Brides or long-term travelers
- Anyone seeking semi-permanent transformation without frequent maintenance
✅ Unlike clip-ins or tape-ins, I-tips require no daily reapplication or short wear cycles.
3. Clients Avoiding Heat or Glue
I-tip installation involves no heat, glue, or adhesives, making it a great solution for:
- Sensitive scalps
- Chemically processed or bleached hair
- Eco-conscious clients looking to avoid chemical-based methods
♻️ Cold fusion makes this method more sustainable and hair-friendly.
4. Clients Who Prefer Custom Styling
Because I-tip extensions move independently, they allow for maximum styling versatility:
- Easy to create layers, highlights, or specific volume zones
- Can be installed in small sections around the face or crown
- Suitable for ponytails, braids, and updos (if installed strategically)
5. Experienced Wearers or Clients Ready to Commit
Due to the time and cost involved in application and maintenance, I-tip extensions are best suited to:
- Clients familiar with professional extensions
- Those ready to commit to proper aftercare and salon visits every 6–8 weeks
- Stylists working with repeat clientele who value quality over convenience
🚫 Who Should Be Cautious?
While I-tips are highly versatile, they may not be ideal for:
- Clients with very oily scalps, as rings may slip
- Those who sweat heavily (athletes, frequent gym-goers)
- Individuals unwilling to follow an aftercare routine (e.g., brushing, drying roots)
Always offer a consultation before installation to assess hair density, scalp condition, and lifestyle compatibility.
Conclusion
I-tip extensions are a favorite among stylists for their non-damaging application, reusable structure, and natural finish. If you’re looking for a strand-by-strand method that offers both performance and comfort, this technique may be the best fit for your salon or your client.
At N Hair Factory, we offer high-quality I-tip hair extensions made from 100% Vietnamese human hair—carefully selected, handcrafted, and quality-checked for European standards.
Related Articles
Pre-Bonded vs. Keratin Bond Hair Extensions: What’s the Difference?
Are Keratin Bond Extensions Good for Thin Hair?
What Are Nano Hair Extensions?