Hair Knowledge
How to Put in Clip-In Hair Extensions: A Step-by-Step Guide for a Flawless Look
1. What Are Clip-In Hair Extensions?
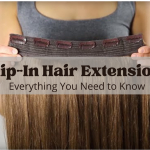
Clip-in hair extensions are temporary wefts of human or synthetic hair attached to your natural hair using small, pressure-sensitive clips. Designed for convenience and versatility, they add instant volume, length, or highlights without professional help or long-term commitment.
2. What You’ll Need
Before installing clip-ins, make sure you have the right tools:
-
A complete set of clip-in hair extensions (typically 7–10 pieces)
-
Sectioning clips
-
A rat-tail comb
-
A mirror (ideally two for front and back view)
-
Hairbrush or detangling comb
-
Texturizing spray or dry shampoo (optional for grip)
3. Step-by-Step Guide: How to Put In Clip-In Hair Extensions
Step 1: Brush and Prep Your Natural Hair
Start with clean, dry hair. Brush out all tangles and part your hair horizontally, beginning about an inch above the nape of your neck. Clip the upper portion of your hair out of the way.
Step 2: Apply the First Weft
Take the smallest weft (usually with 2–3 clips) and secure it to the roots of the parted section. Snap the clips closed, ensuring they sit flat against your scalp.
Step 3: Work Your Way Up
Continue creating horizontal parts about 1 inch apart. Each time, release a section of your natural hair to cover the previous weft, then attach the next largest weft above it. Use the widest pieces at the crown and smaller wefts at the sides.
Step 4: Blend and Style
Once all wefts are secured, gently brush through your hair to blend the extensions with your natural strands. Use a straightener or curling iron on low heat if your clip-ins are made from human hair. For synthetic hair, check heat compatibility.
Step 5: Final Touches
Adjust placement if needed, tease the roots slightly for volume, or use a styling product to finish the look. Make sure all clips are hidden and the extensions feel secure.
4. Tips for a Natural Look
-
Match extension color and texture to your natural hair.
-
Trim the extensions after installation to blend with your haircut.
-
Use layered placement for the most realistic finish.
-
Avoid installing too close to your hairline or part.
5. Common Mistakes to Avoid
-
Clipping into too little hair (can cause slippage).
-
Installing unevenly or too high up.
-
Skipping the blend — always style your real hair with the extensions.
-
Using synthetic hair with heat styling tools without checking compatibility.
6. Who Should Wear Clip-In Extensions?
Clip-ins are ideal for:
-
Beginners looking for an easy, commitment-free solution.
-
Clients who want to switch styles often.
-
People with medium to thick hair (for best clip grip).
-
Special occasions like weddings, photoshoots, or events.
However, they may not be suitable for:
-
Very fine or thinning hair (clips may be visible or cause strain).
-
Active lifestyles where frequent removal is inconvenient.
Final Thoughts
Now that you know how to put in clip-in hair extensions, you can elevate your style in just minutes — no salon visit needed. With the right technique and a bit of practice, clip-ins can look completely natural and feel comfortable all day long.
Maybe you also interested:
Do clip in hair extensions damage your hair?
Clip-In Hair Extensions: Everything You Need to Know


